Institute కి రండి | Demo వినండి | Decide అవ్వండి. ( Online Class Available )
Google Search Console Tutorial - Complete Guide 2026

Google Search Console Tutorial
Introduction
Google Search Console (GSC) is one of the most powerful tools available for website owners, SEO professionals, and digital marketers. It provides essential information about website performance, indexing issues, search rankings, and user experience. Unlike Google Analytics, which focuses on visitor behavior, Google Search Console helps monitor and optimize a site’s presence in Google Search results.
In this comprehensive guide, we will explore Google Search Console in detail, covering its setup, features, benefits, best practices, and advanced techniques to help you maximize your website’s SEO potential.
What is Google Search Console?
Google Search Console (GSC) is a free web service provided by Google that helps website owners, SEO professionals, and developers monitor, maintain, and troubleshoot their website’s presence in Google Search results. It provides valuable information like how Google views and interacts with your website, making it an essential tool for improving your site’s visibility, performance, and overall SEO strategy.
Importance of Google Search Console
1. Helps Improve Search Rankings: GSC provides data on which keywords bring traffic to your site, how your pages rank, and how users interact with your content. By analyzing this data, you can optimize your pages and improve their rankings in Google Search.
2. Monitors Website Indexing and Crawling: If Google cannot index your pages, they won’t appear in search results. GSC helps you track which pages are indexed and alerts you about any indexing or crawling issues, such as:
Pages blocked by robots.txt
Pages marked with no index tags
Crawl errors like 404 (Not Found) pages
3. Detects and Fixes Website Errors: GSC alerts you about critical issues affecting your site’s performance, such as:
Server errors
Mobile usability problems
Slow page loading speed
Security threats (hacking, malware, or spam)
4. Enhances Website Performance on Mobile Devices: Since Google uses mobile-first indexing, websites must be mobile-friendly to rank higher. The Mobile Usability Report in GSC identifies any issues preventing your site from offering a smooth experience on mobile devices.
5. Provides Insights into Clicks, Impressions, and CTR: The Performance Report in GSC shows:
Clicks – How many times users clicked on your website from Google Search.
Impressions – How often your site appears in search results.
Click-Through Rate (CTR) – The percentage of users who click on your site after seeing it in search results.
6. Helps with Sitemap Submission and Indexing: Submitting an XML sitemap in GSC helps Google discover and index your website’s pages more efficiently. This is especially useful for new websites, updated content, or large sites with many pages.
7. Identifies Backlink Data: The Links Report in GSC shows which websites are linking to yours (backlinks) and how your internal linking is structured. Backlinks are an essential factor for SEO, and monitoring them helps you build a stronger link profile.
This video provides a brief introduction to Google Search Console and guides you on how to use it effectively.
Setting Up Google Search Console
- Go to https://search.google.com/search-console/.
- Click “Start Now” and log in with your Google account.
- Choose a property type:
- Domain Property (covers all URLs under a domain)
- URL Prefix Property (specific protocol and subdomain)
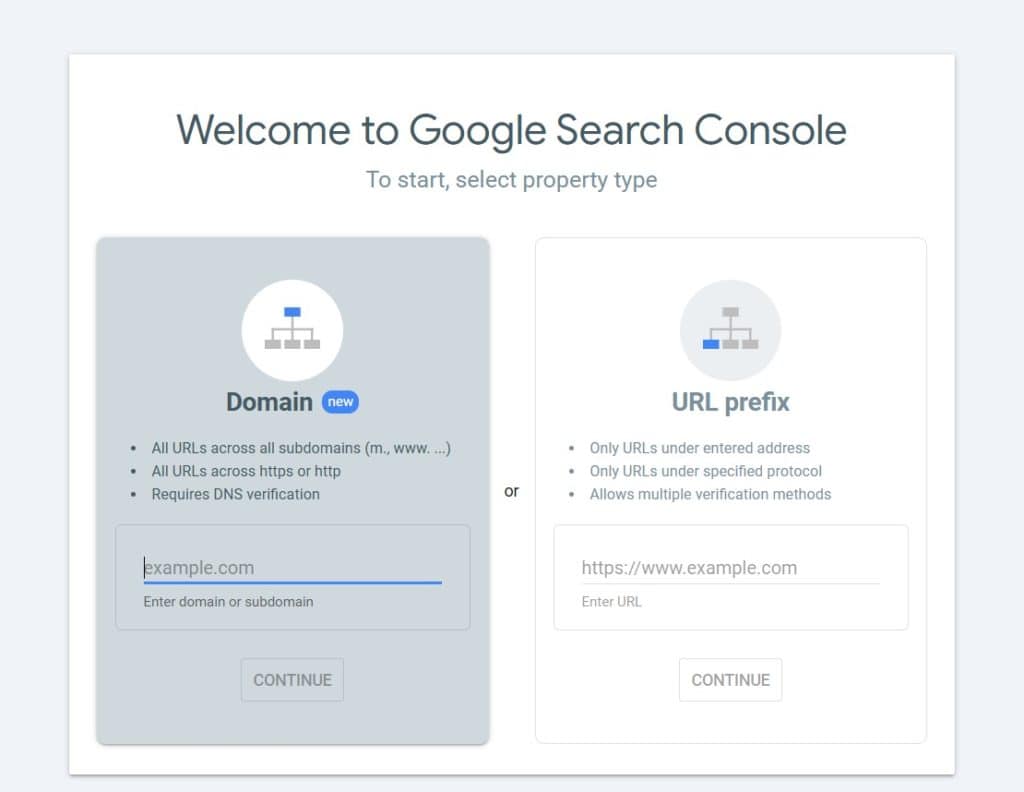
Google provides two ways to add your website:
1. Domain Property (Recommended for full tracking)
- Tracks all versions of your website (www, non-www, HTTP, HTTPS, and subdomains).
- Requires DNS verification.
How to Add a Domain Property?
- Select “Domain” as the property type.
- Enter your domain (e.g., example.com, without http:// or https://).
- Click “Continue” and follow the DNS verification.
2. URL Prefix Property (For single version tracking)
- Tracks only one version of your website (e.g., https://www.example.com/ or http://example.com/).
- Allows multiple verification methods.
How to Add a URL Prefix Property?
- Select “URL Prefix” as the property type.
- Enter your full website URL, including https:// or http://.
Click “Continue” and proceed with verification.
Verification Methods in Google Search Console
1. DNS Verification (Recommended for Domain Property Users)
- After selecting Domain Property, Google will provide a TXT record.
- Log in to your domain registrar (GoDaddy, Namecheap, Bluehost, Cloudflare, etc.).
- Navigate to DNS Settings and add a new TXT record.
- Paste the TXT record provided by Google and save the changes.
- Return to Google Search Console and click “Verify”.
- Wait for verification (it can take a few hours).
Why Use This Method?
- Covers all subdomains and both HTTP & HTTPS versions.
- Best for business websites and large organizations.
2. HTML File Upload (For URL Prefix Property Users)
- Download the HTML verification file from GSC.
- Access your website’s root directory using FTP or cPanel.
- Upload the file to your site’s public folder.
- Go back to Google Search Console and click “Verify”.
Why Use This Method?
- Works best for developers and website owners with FTP access.
3. HTML Meta Tag Verification (For CMS Users like WordPress, Shopify, etc.)
- Copy the meta tag provided by GSC.
- Open your website’s HTML code (or use a plugin like Insert Headers and Footers for WordPress).
- Paste the meta tag inside the <head> section of your homepage.
- Go back to Google Search Console and click “Verify”.
Why Use This Method?
- Quick and easy for WordPress, Shopify, and CMS users.
- No need for FTP or DNS changes.
4. Verify via Google Analytics (For GA4 Users)
- Make sure you have Google Analytics (GA4) installed on your website.
- Log in to Google Search Console and select “Verify using Google Analytics”.
- If GA is properly set up, Google will verify the site automatically.
Why Use This Method?
- Fast verification for websites already using Google Analytics.
5. Verify via Google Tag Manager (For GTM Users)
- Make sure you have Google Tag Manager (GTM) installed on your website.
- Choose “Verify using Google Tag Manager” in GSC.
- If GTM is correctly set up, Google will verify the site instantly.
Why Use This Method?
- Ideal for websites that use Google Tag Manager for tracking.
Here’s a short video from the Google Search Console team that explains the various verification methods in detail.
Connecting Google Search Console with Google Analytics
Why should you link Google Search Console with Google Analytics?
✔ ️ Get search query data directly in Google Analytics.
✔ Compare organic search performance with user behavior.
✔ Track which keywords drive the most traffic and conversions.
Steps to Link Google Search Console with GA4
- Open Google Analytics (GA4)
- Log in to your Google Analytics account.
- Go to Admin Panel
- In the left menu, click on Admin.
- Find “Search Console Links”
- Under Product Links, click “Search Console Links”.
- Click “Link” and Select Your GSC Property
- Click the “Link” button and choose your Google Search Console Property.
- Confirm and Save
- Click “Confirm”, then “Save” to complete the integration.
Learn more about setting up Google Analytics
How to Submit a Sitemap in Google Search Console?
A sitemap is an XML file that contains a list of all the important pages on your website. It helps search engines efficiently crawl and index your site.
Why is a Sitemap Important?
✔ ️ Ensures Google finds all pages, including new and updated content.
✔ Improves indexing for large websites or those with complex structures.
✔ Helps identify pages that Google might have missed during crawling.
Step-by-Step Guide to Submitting a Sitemap in GSC
- Create a Sitemap
- Most CMS platforms (like WordPress) automatically generate a sitemap.
- For WordPress users, plugins like Yoast SEO or Rank Math can create a sitemap for you.
- Manually create one using an XML generator like XML-Sitemaps.com.
The sitemap URL typically looks like:
https://example.com/sitemap.xml
2. Submit the Sitemap in Google Search Console
- Log in to Google Search Console.
- Select Your Website from the property list.
- Click “Indexing” > “Sitemaps” in the left menu.
- In the “Add a New Sitemap” box, enter the sitemap URL (e.g., sitemap.xml).
- Click “Submit”.
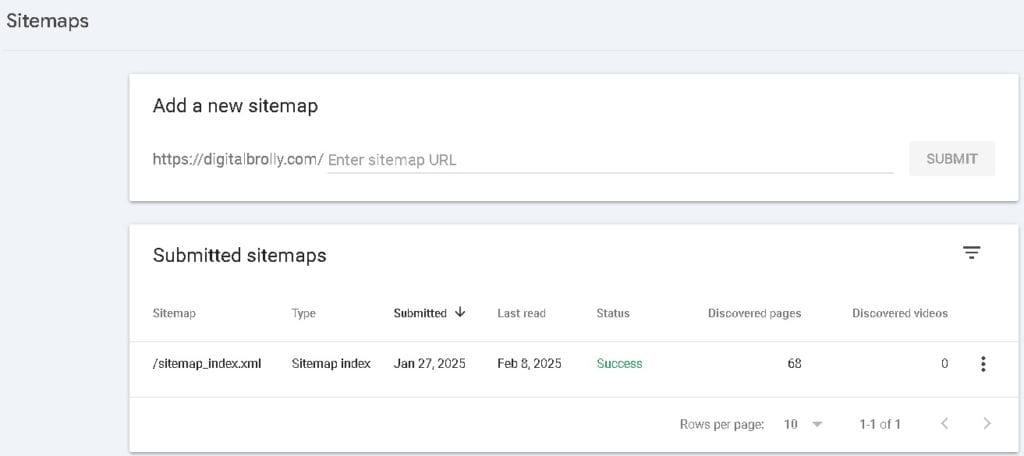
3. Check for Sitemap Errors
- GSC will display the sitemap status:
✅ Success – Your sitemap is working fine.
❌ Error – Check for issues like:- Incorrect sitemap format
- Broken URLs
- Restricted access in robots.txt
Here’s a short video from the Google Search Console team that explains the 3 Tips for setting up sitemap in detail.
Navigating the Google Search Console Dashboard
GSC dashboard provides access to different reports and tools. Here’s what each section does
Overview: | Provides a summary of website performance, indexing, and errors. |
Performance | Tracks search traffic, keywords, clicks, impressions, and rankings. |
Indexing | Displays which pages are indexed and alerts you about indexing issues. |
Experience | Monitors Core Web Vitals, mobile usability, and security. |
Enhancements | Helps optimize structured data, rich snippets, and AMP pages. |
Security & Manual Actions | Alerts you to Google penalties and security risks. |
Links | Tracks internal and external backlinks. |
Settings | Manages GSC properties, users, and ownership settings. |
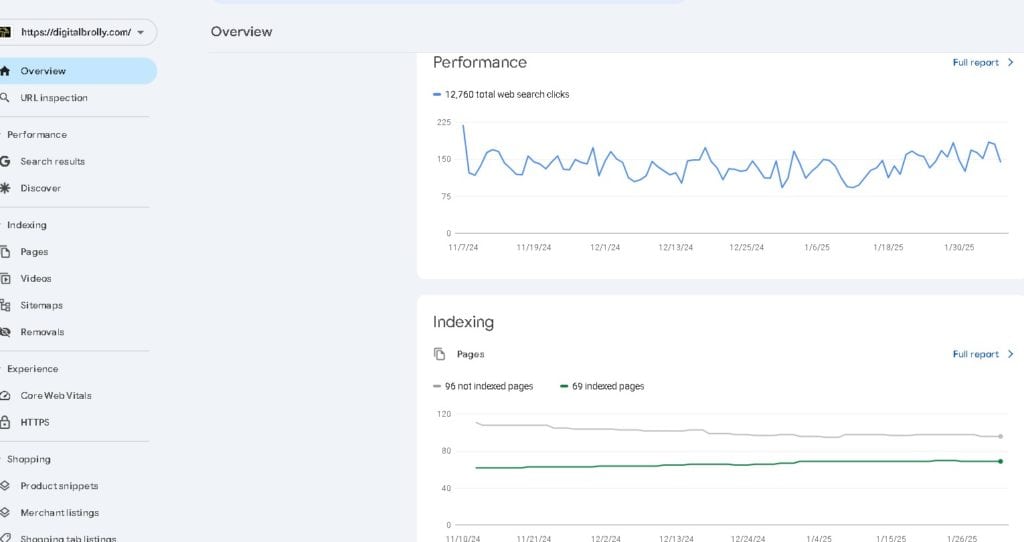
Performance Reports in Google Search Console
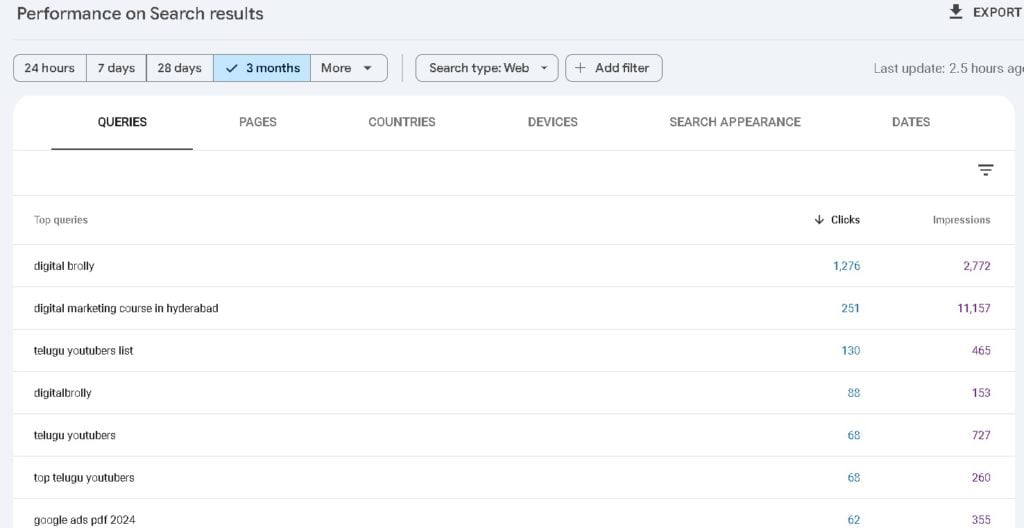
The Performance Reports in Google Search Console (GSC) provide how your website performs in Google Search results. These reports help you track search traffic, analyze keyword rankings, impressions and optimize content to increase visibility and clicks.
- Metrics:
Total Clicks – How many users clicked on your site from search results.
Total Impressions – How often your pages appeared in search results.
Average Click-Through Rate (CTR) – Percentage of impressions that turned into clicks.
Average Position – Your website’s ranking for different queries. - How It Helps:
- Find out which keywords drive traffic to your site.
- Optimize low-CTR pages by improving meta titles and descriptions.
- Identify opportunities to rank higher for specific queries.
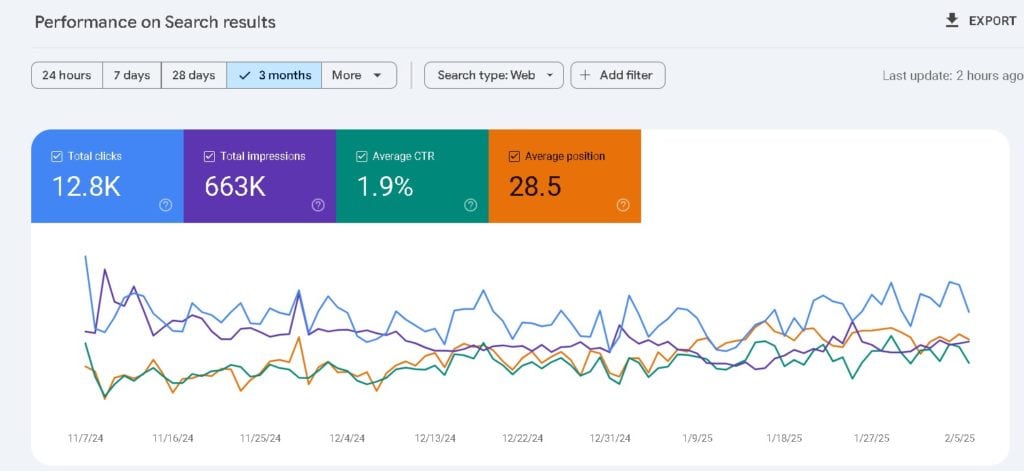
Analyzing Performance Data
- Use the Date Filter to analyze different time periods.
- Compare search queries, pages, countries, and devices.
- Identify high-performing keywords and optimize content accordingly.
Understanding Search Queries, Impressions, Clicks, and CTR
The Performance Report provides four key metrics that help you measure your website’s success in Google Search.
- Analyze Search Queries to Find Valuable Keywords
- Go to Performance > Queries to see the exact keywords users are searching for.
- Identify high-impression but low-click queries—these are keywords where your site ranks but isn’t getting enough clicks.
- Optimize content by including these keywords in headings, subheadings, and body text.
- Improve CTR by Optimizing Titles and Meta Descriptions
- A low Click-Through Rate (CTR) means your pages appear in search results, but users are not clicking on them.
- Go to Performance > Pages and look for pages with:
- High impressions but low CTR (fix title and meta description).
- Low impressions and clicks (improve keyword targeting).
- To boost CTR:
Write engaging and keyword-rich meta titles.
✅ Use power words and numbers (e.g., “10 Best SEO Tips for 2024”).
✅ Keep meta descriptions concise, clear, and benefit-driven.
- Use the “Pages” Report to Identify Top-Performing Content
- Navigate to Performance > Pages to see which pages get the most clicks.
- Identify high-performing pages and update them with fresh content.
- If a page ranks well but has low CTR, tweak the title and meta description.
- If a page has high CTR but low impressions, optimize it for more keywords.
- Compare Performance on Desktop vs. Mobile
- Go to Performance > Devices to see how users interact with your site on desktop vs. mobile.
- If mobile CTR is low, check:
✅ Mobile usability issues in GSC.
✅ Page speed using Google PageSpeed Insights.
✅ Content formatting for better readability on small screens.
- Track Search Trends by Country & Region
- Go to Performance > Countries to see where your audience is coming from.
- If a country has high impressions but low CTR, consider:
✅ Translating content for a local audience.
✅ Optimizing for region-specific keywords.
✅ Using Google Trends to find popular topics in that region.
URL Inspection
The URL Inspection in Google Search Console (GSC) is a powerful feature that allows website owners to check the indexing status of individual pages, identify technical issues, and request reindexing when necessary.
Checking if a Page is Indexed in Google
If your page isn’t appearing in search results, the first step is to check whether Google has indexed it.
Steps to Check if a Page is Indexed:
- Use the URL Inspection Tool
- Enter the URL in GSC and check the indexing status.
- Look for “URL is on Google” or “URL is not on Google”
- If indexed, you’ll see a green checkmark with “URL is on Google.”
- If not indexed, you’ll see “URL is not on Google” with reasons why.
- Check the Last Crawl Date
- If Google hasn’t crawled the page recently, you may need to request indexing.
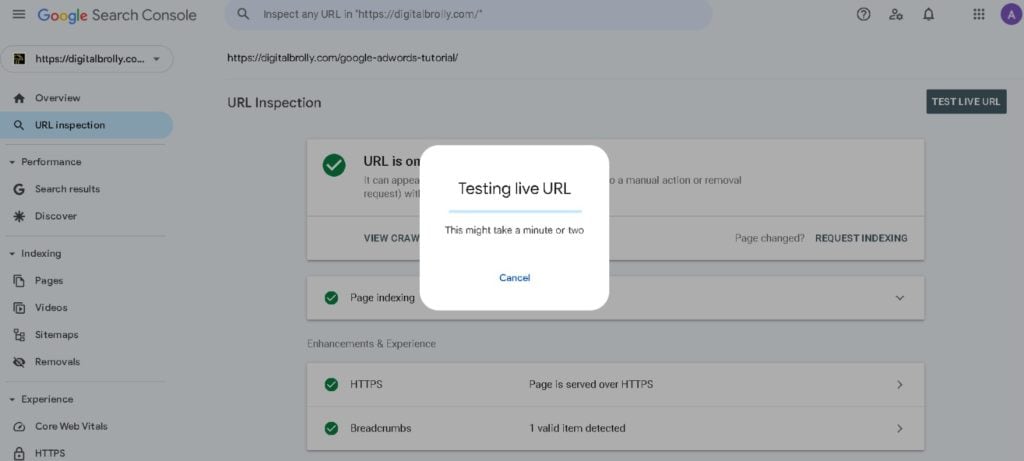
After Testing The URL if page is not getting index then FIX the issues.
Why a Page Might Not Be Indexed & How to Fix It
If the URL Inspection Tool says “URL is not on Google”, it means Google has not indexed the page. Here are common reasons and solutions:
1. The Page is Blocked by Robots.txt
What It Means: Your website’s robots.txt file is preventing Google from crawling the page.
How to Fix:
- Go to yourwebsite.com/robots.txt.
- Remove the Disallow rule if the page should be indexed.
2. The Page Has a “Noindex” Tag
What It Means: The page contains a noindex directive, which tells Google not to index it.
How to Fix:
- Remove the noindex tag and save the changes.
3. The Page is “Crawled – Currently Not Indexed”
What It Means: Google has crawled the page but decided not to index it.
How to Fix:
- Improve the content quality (add unique and valuable information).
- Ensure the page has internal links from other indexed pages.
- Request reindexing (see next section).
4. Google Hasn’t Crawled the Page Yet
What It Means: If the page is new, Google may not have discovered it yet.
How to Fix:
- Submit the URL to Google Search Console.
- Add internal links to the page from other indexed pages.
- Ensure the page is included in your XML sitemap.
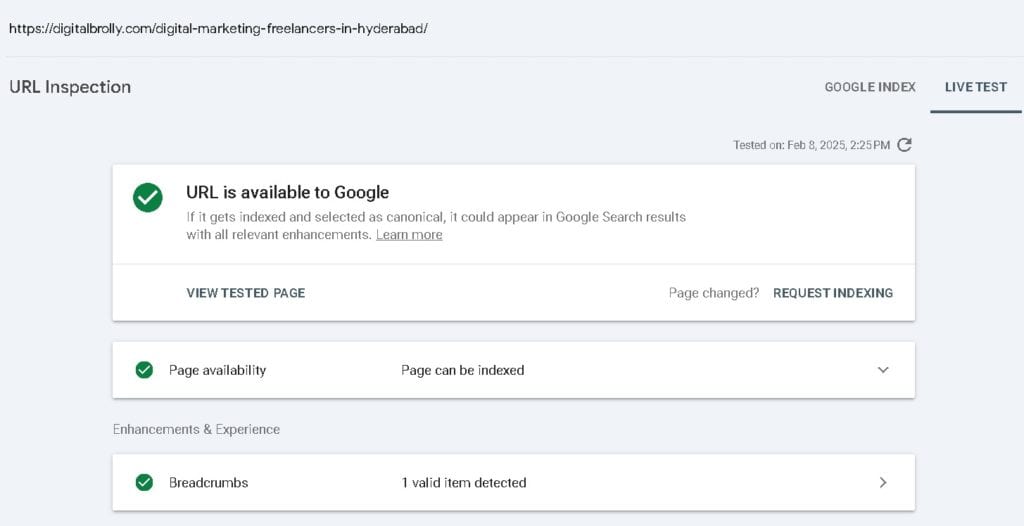
Here’s a short video from the Google Search Console team that explains the URL inspection in search console in detail.
After Fixing the issues if everything is ok the Request reindexing
Requesting Reindexing for Updated Content
If you fix an issue or update content, you should request reindexing to speed up the process.
How to Request Indexing in Google Search Console?
- Use the URL Inspection Tool
- Enter the page URL in the search bar.
- Click “Enter” to check the page status.
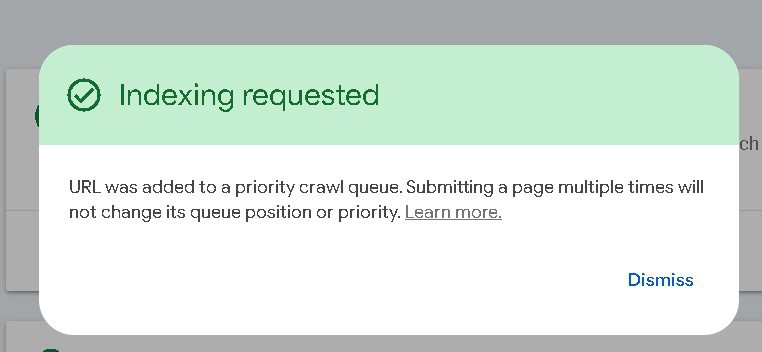
- Click “Request Indexing”
- If the page isn’t indexed, or you made updates, click “Request Indexing”.
- Wait for Google to Process the Request
- Google will prioritize crawling the page within a few hours to a few days.
- Check Indexing Status Later
- After a few days, use the URL Inspection Tool again to confirm if the page is indexed.
On the next URL Inspection page, select Request Indexing
Index Coverage Reports and Fixing Indexing Issues
The Index Coverage Report in Google Search Console (GSC) helps you track which of your website’s pages Google has indexed and which ones have issues. If your pages aren’t indexed, they won’t appear in Google Search, leading to lost traffic and lower rankings.
The Index Coverage report provides information into how Google is indexing your site. It categorizes pages into different statuses to help you identify and resolve indexing issues. Here’s what each status means:
- Valid: Pages that have been successfully indexed and can appear in search results without any known issues.
- Excluded: Pages that Google intentionally did not index. This may be due to directives like no index tags, disallow rules in robots.txt, duplicate content, or canonicalization settings.
- Errors: Pages that could not be indexed due to serious issues, such as server errors (5xx), 404 errors, or blocked resources preventing crawling.
- Warnings: Pages that have been indexed but contain potential issues that might need attention, such as pages indexed despite having noindex directives.
Regularly monitoring the Index Coverage report ensures that all important pages are correctly indexed and available in search results.
Fixing Indexing Issues
When pages fail to index correctly, it can impact search visibility. Follow these steps to diagnose and resolve indexing problems:
- Open the Coverage Report in Google Search Console.
- Identify and click on the error message (e.g., “Submitted URL has crawl issue” or “Blocked by robots.txt”).
- Use the URL Inspection Tool to analyze the page and check for specific issues.
- Resolve the problem based on the error type:
- If a page is blocked by robots.txt, update the file to allow crawling if necessary.
- If marked with a noindex tag, remove it if you want the page indexed.
- Fix any 404 Not Found errors by redirecting or restoring the missing page.
- Ensure that the sitemap includes the correct URLs and submit an updated version.
- Improve page quality if it was excluded due to low-value content.
- After making the necessary fixes, return to GSC and click “Validate Fix” to request re-indexing.
Removals in Google Search Console
The Removals tool in Google Search Console allows website owners to manage how their content appears in Google Search by temporarily or permanently removing specific URLs. It provides three key options:
1. Temporary Removals: This option allows you to temporarily remove a URL from Google Search results. It does not delete the page from your website, but it prevents it from appearing in search results for about six months. There are two types of temporary removals:
- Remove this URL temporarily – The URL is hidden from Google Search for about six months, and the cached version is cleared.
- Clear cached URL – The cached page and snippet in search results are removed, but the page itself may still appear in search if it is re-crawled.

2. Outdated Content: This section helps you track removal requests made by users through Google’s Outdated Content Removal Tool. If someone reports that a page no longer exists or that certain content has changed, Google may update or remove the outdated content from search results. This is particularly useful for website owners to monitor and manage outdated or incorrect search listings.
3. SafeSearch Filtering: Here, you can see if any of your URLs have been reported and removed due to Google SafeSearch filtering. SafeSearch is designed to filter out explicit or inappropriate content from search results. If a URL from your site has been flagged, it may not appear in search results for users with SafeSearch enabled.
If you need to quickly remove content from Google Search, this is where you can submit your request.
Here’s a short video from the Google Search Console team that explains the Removals in search console in detail.
Enhancing Website Experience with Page Experience Report
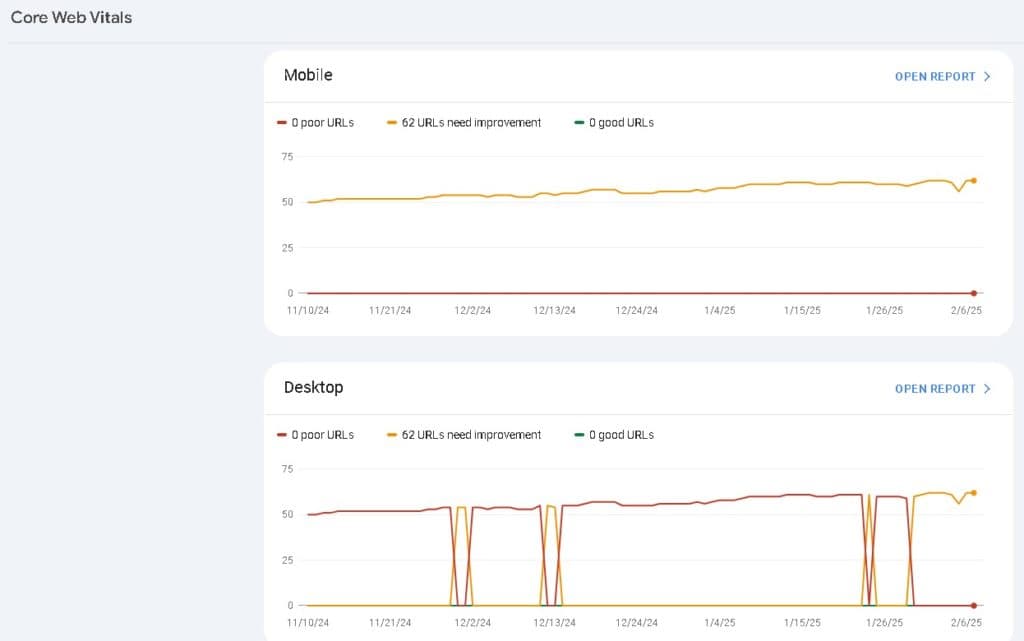
Google prioritizes websites that deliver a great user experience. The Page Experience Report in Google Search Console (GSC) evaluates how well your website performs based on factors like Core Web Vitals, mobile usability, and security.
Understanding Core Web Vitals
Core Web Vitals are a set of key performance metrics that measure how fast and stable your website is for users. These metrics are crucial because Google uses them as a ranking factor.
What Are the Core Web Vitals Metrics?
Metric | What It Measures | Ideal Score |
Largest Contentful Paint (LCP) | How fast the main content of the page loads. | Less than 2.5 seconds |
First Input Delay (FID) | How quickly a page responds to user interactions (clicks, taps). | Less than 100 ms |
Cumulative Layout Shift (CLS) | Measures how stable the page layout is while loading. | Less than 0.1 |
Improving Page Speed and Mobile Usability
1.How to Improve Largest Contentful Paint (LCP)?
- Optimize images – Use compressed formats like WebP and lazy loading.
- Minimize JavaScript and CSS – Reduce render-blocking scripts.
- Enable caching – Store page assets to load faster for repeat visitors.
- Use a CDN (Content Delivery Network) – Delivers content from the closest server to users.
2. How to Improve First Input Delay (FID)?
- Reduce JavaScript execution time – Minimize heavy scripts.
- Use browser caching – Load assets faster from cache.
- Defer non-essential JavaScript – Prevent scripts from blocking user actions.
3. How to Improve Cumulative Layout Shift (CLS)?
- Set explicit sizes for images and ads – Prevent sudden layout shifts.
- Use CSS animations properly – Avoid unexpected page jumps.
- Reserve space for embeds (e.g., videos, ads) – Predefined element sizes.
4. How to Improve Mobile Usability?
- Use responsive design – Ensure content adapts to different screen sizes.
- Increase font size – Text should be at least 16px for readability.
- Improve tap targets – Buttons and links should be large enough for mobile users.
- Enable fast-loading AMP (Accelerated Mobile Pages) – Helps improve speed on mobile.
Fixing Security Issues and HTTPS Concerns
Google gives preference to secure websites using HTTPS. If your site has security issues, it may be flagged in search results, affecting both rankings and trust.
Common Security Issues in Google Search Console
- Hacked Content – Malicious code inserted into your site.
- Phishing Warnings – Fake login forms stealing user data.
- Malware and Unwanted Software – Pages containing harmful downloads.
How to Check Security Issues in GSC?
- Go to Google Search Console.
- Click on “Security & Manual Actions” > Security Issues.
- Review any warnings and take action.
How to Fix Security Issues?
- Scan your website for malware – Use tools like Google Safe Browsing, Sucuri, or Wordfence.
- Remove hacked content – If flagged, clean up affected pages and update security.
- Request a review in GSC – After fixing security problems, click “Request a Review” in GSC.
Ensuring Proper HTTPS Implementation
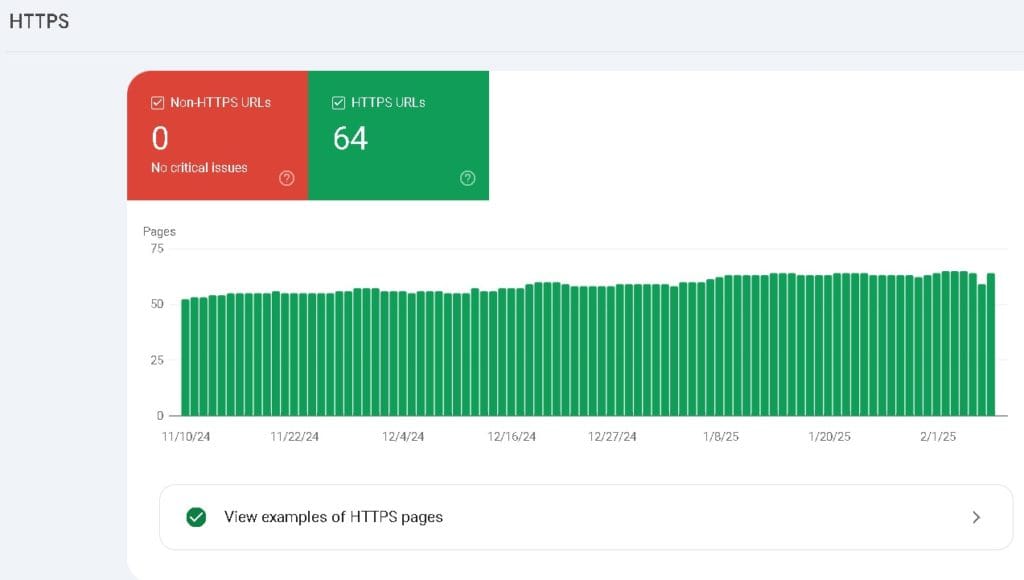
HTTPS is a Google ranking factor, and all websites should be secured with SSL encryption.
How to Check HTTPS in GSC?
- Go to “Page Experience” > HTTPS Report.
- If your site is not secure, Google will show warnings.
How to Fix HTTPS Issues?
- Get an SSL Certificate – Install an SSL certificate from your hosting provider.
- Redirect HTTP to HTTPS – Use a 301 redirect to ensure all traffic goes to HTTPS.
- Update Internal Links – Change all internal links to HTTPS.
- Fix Mixed Content Issues – Make sure all images, scripts, and CSS files load over HTTPS.
Shopping Section in Google Search Console
Google Search Console includes a Shopping section where you can monitor how Google processes your product listings and whether they qualify for rich results.
In this section, you can:
✅ Check if your product data is valid
⚠️ Identify missing fields that could enhance product snippets
🔍 Click on a product to see which fields are missing and whether they are essential or optional enhancements
If you’ve added structured data to your products, you can validate fixes directly in Search Console to ensure proper indexing and rich result eligibility.
Enhancing Search Appearance with Rich Results
Rich results (formerly known as rich snippets) are enhanced search results that display additional information beyond the standard title, URL, and description. These results use structured data (schema markup) to provide users with more context and visual appeal, increasing click-through rates (CTR) and engagement.
Key Elements of Rich Results:
- Breadcrumbs:
- Improve site navigation.
- Help users understand page hierarchy in search results.
- FAQ Schema:
- Displays frequently asked questions in search results.
- Enhances visibility and provides quick answers to users.
- Product Snippets:
- Show detailed product information (price, availability, and reviews).
- Boosts CTR for eCommerce websites.
- Review Stars:
- Displays user ratings for products, businesses, or content.
- Increases credibility and attracts clicks.
- Event Details:
- Provides event information (date, time, and location) in search results.
- Enhances discoverability for event-related searches.
What Is Schema Markup?
Schema markup (structured data) is a type of code added to your website to help Google understand your content and display rich results.
Common Types of Schema Markup:
Schema Type | Purpose | Example Use Case |
Article | Enhances blog posts/news | News articles, guides, how-to posts |
FAQ | Displays FAQs in search | Product pages, service pages |
Product | Shows product details | E-commerce pages |
Review | Adds star ratings | Product reviews, testimonials |
Event | Displays event info | Conferences, concerts |
Recipe | Shows cooking details | Food blogs, recipe sites |
Breadcrumb | Improves navigation | Websites with categories & subcategories. |
Handling Manual Actions and Security Issues
Manual actions and security issues can severely impact your website’s search rankings or even remove your site from Google Search results altogether. Google Search Console (GSC) alerts you if your website violates Google’s Webmaster Guidelines or has been compromised by malware, hacking, or security threats.
Manual Actions in Google Search Console
Manual Actions in Google Search Console refer to penalties applied by Google’s human reviewers when a website violates Google’s spam policies. These actions can result in pages or entire sites being demoted or removed from search results.
Common Reasons for Manual Actions
Google may apply a manual action for various reasons, including:
- Spammy or Low-Quality Content
- Auto-generated or scraped content
- Thin content with little to no value
- Doorway pages (created to rank but offer no real value)
- Unnatural Links
- Unnatural inbound links (link schemes, paid backlinks)
- Unnatural outbound links (selling or exchanging links to manipulate rankings)
- Cloaking & Deceptive Practices
- Cloaking (showing different content to users and search engines)
- Sneaky redirects (misleading users to unexpected pages)
- Keyword & Structured Data Violations
- Keyword stuffing
- Misuse of structured data (false or misleading schema markup)
- Security & User Safety Issues
- Hacked site (malware or injected spam)
- Social engineering (phishing, deceptive ads)
Here’s a short video from the Google Search Console team that explains the Manual actions in the search console in detail.
Security Issues in Google Search Console
The Security Issues section in Google Search Console alerts website owners to potential threats that could harm users or compromise a site’s integrity. These issues can cause warnings in search results and may even lead to Google removing the site from search rankings until the problems are resolved.
Common Security Issues in Google Search Console
1. Hacked Content
What it is: Unauthorized modifications to a website due to hacking.
Examples:
- Injection of spammy content or links
- Redirects sending users to malicious sites
- Hidden code or scripts (e.g., cryptocurrency miners)
2. Malware & Unwanted Software
What it is: Harmful software embedded in a site that may infect visitors’ devices.
Examples:
- Drive-by downloads (users get infected without clicking)
- Malicious scripts or Trojans
- Fake software downloads
3. Social Engineering (Phishing & Deceptive Content)
What it is: Pages that try to trick users into revealing sensitive information.
Examples:
- Fake login pages mimicking banks or social media
- Pop-ups pretending to be system alerts
- Deceptive ads or download buttons
4. Unwanted or Harmful Downloads
What it is: Files offered for download that contain malicious software.
Examples:
- Software bundling malware or spyware
- Deceptive installers with hidden malicious programs

Monitoring Backlinks with the Links Report
Links in Google Search Console
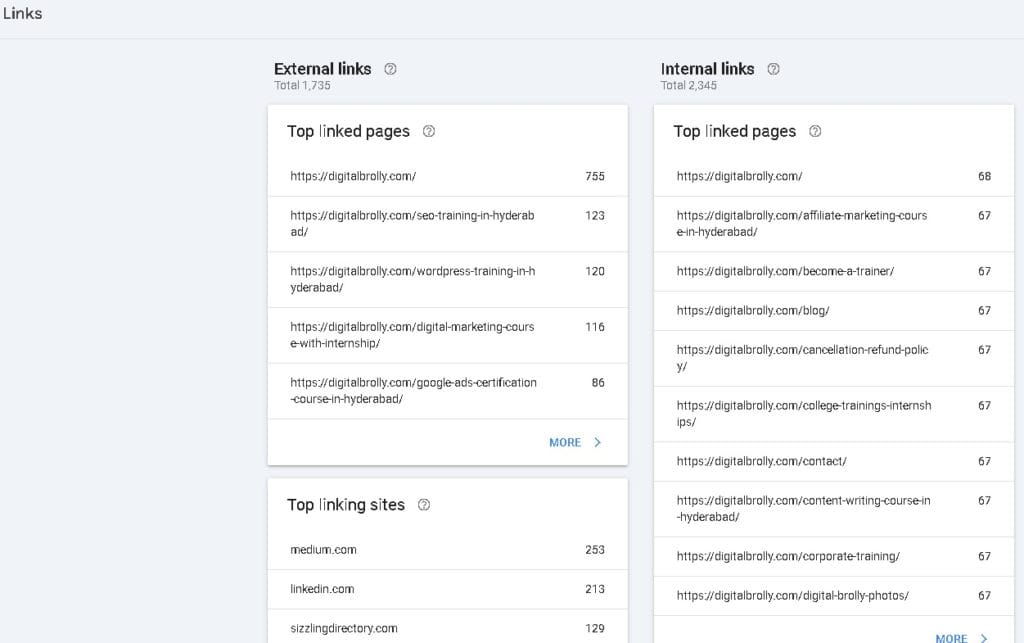
Google Search Console provides insights into the links pointing to and within your site. Understanding your link profile can help improve SEO and site authority.
Types of Links in GSC
- External Links (Backlinks)
- Links from other websites pointing to your site.
- Help improve your domain authority and rankings.
- Found under Links > Top linked pages (External).
- Internal Links
- Links between pages within your own website.
- Improve user navigation and distribute link equity.
- Found under Links > Top linked pages (Internal).
- Top Linking Sites
- Websites that link to your site most frequently.
- Useful for identifying your strongest backlinks.
- Top Linking Text
- The anchor text most commonly used to link to your site.
- Helps analyze how your site is referenced.
How to Disavow Bad Backlinks?
If you can’t manually remove toxic backlinks, you can ask Google to ignore them using the Google Disavow Tool.
Steps to Disavow Bad Backlinks:
- Identify toxic backlinks using:
- Google Search Console Links Report
- SEO tools like Ahrefs, SEMrush, or Moz
- Create a Disavow File
- Open Notepad or any text editor.
- Save the file as disavow.txt.
- Submit the Disavow File to Google
- Visit Google Disavow Tool.
- Select your website.
- Upload the disavow.txt file and submit.
Important: Only disavow links if they are truly harmful, as disavowing good links can negatively affect rankings.
Here is the Link how to disavow spam links: https://support.google.com/webmasters/answer/2648487?hl=en
Setting Users, Owners, And Permissions
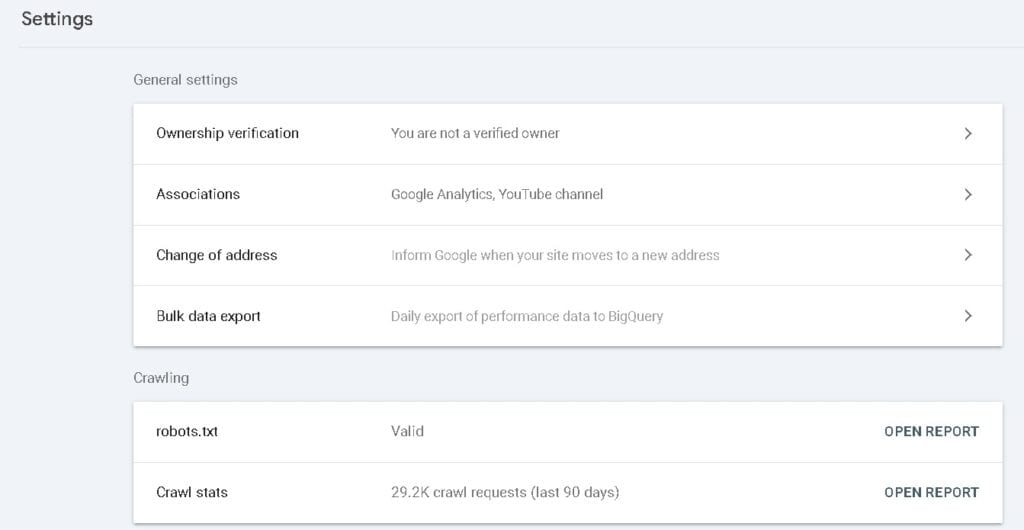
Google Search Console allows you to grant different levels of access to users, ensuring that the right people have the necessary permissions to manage your site’s search performance effectively.n
1. Types of Users and Permissions
- Owner: Full control over all settings and permissions. Owners can add or remove users and access all reports.
- Full User: Can view all data and perform actions, but cannot manage users.
- Restricted User: Can only view select reports but cannot make changes.
- Delegated Owner: A user granted ownership access by a verified owner.
2. Adding and Managing Users
- Go to Settings in Google Search Console.
- Click Users and Permissions.
- Click Add User, enter their email address, and choose their permission level.
- Click Add to confirm.
3. Removing or Changing Permissions
- To change a user’s role, go to Users and Permissions, click the three-dot menu next to their name, and select Change Permission.
- To remove a user, select Remove Access from the same menu.
Properly managing users and permissions ensures that only authorized individuals can make critical changes to your site’s search settings.
Check out our blog Top 10 YouTubers Income in Hyderabad
Want to learn Digital Marketing?
Join our Digital Marketing Course at Digital Brolly and get real-time experience. Learn from experts with live projects and interactive sessions.
FAQ's
GSC is a free tool by Google that helps monitor and improve website performance in search results. It tracks indexing, search traffic, mobile usability, and security issues.
You can verify using DNS, HTML file upload, meta tag, Google Analytics, or Google Tag Manager.
Add your website in GSC, verify ownership, and submit a sitemap under Indexing > Sitemaps.
Use Indexing > Pages in GSC or search site:yourwebsite.com on Google.
Possible reasons: Crawl issues, noindex tags, robots.txt blocking, or low-quality content.
Optimize high-performing keywords, improve Core Web Vitals, fix low CTR pages, and submit updated sitemaps.
Go to Links > External Links to see who links to your site and track backlink quality.
Check Security & Manual Actions, fix the issue (spam, thin content, bad links), and submit a reconsideration request.
These are page speed and user experience metrics. Optimize LCP, FID, and CLS by improving speed and reducing layout shifts.
Check Mobile Usability Report, fix issues like small fonts, clickable elements too close, and slow pages.
Use URL Inspection Tool, check indexing status, and click “Request Indexing”.
A sitemap is an XML file listing important pages. Submit it in Indexing > Sitemaps.
Create a disavow.txt file listing harmful backlinks and upload it using the Google Disavow Tool.
Use clear, concise answers (40-60 words), lists, and structured data (FAQ schema) for better snippet visibility.
- Weekly: Track search performance, errors, and indexing.
- Monthly: Review backlinks and CTR improvements.
- Quarterly: Optimize Core Web Vitals and submit new sitemaps.
